Friday, January 1, 2021

A Taste of San Francisco

 When I started making sourdough bread more than 20 years ago, I wanted to make bread like I used to buy in San Francisco. I have never come close to that taste...until now. I tried this recipe for No-Knead Sourdough bread from King Arthur flour. The taste is just what I had hoped for 20 years ago. I had attributed the difference in taste to the difference in strains of wild yeast where I live. I guess that's not the case. Let's get cooking.

The first step is to mix, but not knead all the dough ingredients. We end up with this sticky mess:


That gets set to "rise" for one hour, and results in a one-hour older sticky mess. Now, we go about stretching and folding the dough and set it aside to rise for another hour. I found the instructions in this companion blog from King Arthur to be very helpful. The wet-hands technique works well.

This process gets repeated every hour for a total of 3 hours. Each time, the dough gets a little smoother.

After the first hour:


After the second hour:

After the third hour:

Now, this is the best part. We cover the dough and put it in the refrigerator for at least 8 but up to 48 hours. That gives us a lot of flexibility for when we want to bake the bread. I finished the three stretch-fold cycles around noon. Then, I left the dough in the fridge until the next morning. It looks smooth.

This dough ball that is still rather sticky gets turned out onto a floured surface and allowed to warm to room temperature for about 15 minutes.

King Arthur tells me that I can shape the dough into a log to bake in a 13" pain de mie pan, put the cover on and let it rise for 2-1/2 to 3 hours. They did say that the dough would not rise vertically, but relax laterally. I was a little worried. This is a lot of dough for that small pan.

but it fits


and it didn't rise much vertically after 2-1/2 hours.


The instructions from King Arthur say to heat the over to 500°F one hour before baking. I thought that was a bit wasteful. My oven tells me when it has reached temperature, so I just waited until it got to 500.

Next, we lower the temperature to 450 and bake for 45-50 minutes. The instructions say to leave the lid off of a pain de mie pan, but use the lid if cooking a boule shape in a Dutch oven. Then, we are to remove the lid from the Dutch oven if we are using that (I didn't), and it is up to the baker to figure out what to do if using a pain de mie pan. We are instructed to bake for another 10-15 minutes, until the center of the loaf reaches 210°F. My loaf center never got past 200 degrees, but it appeared to be burning. I don't even think the last 10 minutes is necessary.

To my surprise, it appears that I made a popover!


There wasn't much rising going on during the dough preparation, but it sure poofed up in the oven. 

The upper crust is difficult to cut into and a little burnt. Other than that, the bread tastes great!


Next time, I think I will bake it for a little bit less time, and skip the extra 10-15 minutes. I'd like to see if I can adapt this recipe to use with my bread machine. I'm using the Zojirushi BB-PAC20. It has programmable modes that I've never attempted. Maybe this is the time to explore that feature.

Before I go, I'd like to explore why this bread tastes so much different from other sourdough recipes I've used. It could be the kneading. Maybe it is the proportion of starter to other ingredients. This recipe doesn't use my formula of creating a sponge from the starter. The sponge is just like a starter refresh, so how does that compare?

This recipe uses 227g of ripe starter. My sponge uses (all ounces are by weight) 4 oz. of starter, 4 oz. of flour, and 4 oz. of water. That's 12 ounces or 340 grams. Well, that's interesting. I'm using more starter and getting less sour flavor.

How is it in proportion to flour? This recipe uses 602 grams (or 21.2 ounces) of flour. My rye and whole wheat recipes use a total of 15.5 ounces of flour. So, I guess I am not using too little starter. Maybe it is the rise and rest times. It looks like I have some experimenting to do.


Friday, June 5, 2020

The Whole Shebang

I've been tinkering around with my starter refresh and my recipes, lately. This post brings the whole work flow into one spot. All ounce measurements refer to weights.

Refreshing the Starter

I've developed a process for refreshing the starter that provides a nicely active culture with zero waste. Start with 2 oz. of old starter from the fridge. Add 2 oz. of water and 2 oz. of white bread flour. Mix it vigorously and put it in a warm (70+ degrees F.) place for 8-10 hours. It should double in size and look bubbly.

Prepare the Sponge

All my recipes use the same sponge. Take 4 oz. of newly refreshed starter. Add 4 oz. of water and 4 oz. of white bread flour. Mix it vigorously. It starts off looking like this.


Place it in a warm spot for 8-10 hours. It should double in size and look bubbly, like this.


Rye Bread Recipe

Add the ingredients to the bread pan in the order shown in the recipe. It's not that critical, but the liquids and spoonfuls go on the bottom. The rye flour goes on top of those. The white flour goes on top of the rye, and the sponge goes on top of the white.

Rye Bread by weight
Water
3 oz.
Milk
3 oz.
Salt
1 tsp
Caraway seeds
1 Tbl
Oil
2 Tbl
Vital gluten
2 tsp
Rye flour
9 oz.
White bread flour
6.5 oz.
Sponge

Set the bread machine for the whole wheat cycle and press start.

The top can look a little ragged. I call this the Pompadour hair style. I thought I had that fixed, once. Maybe not.


Whole Wheat Recipe

As with the rye recipe, add the liquids and spoonfuls on the bottom followed by the whole wheat flour, then the white flour, then the sponge.

Whole Wheat by weight
Water
3 oz.
Milk
3 oz.
Salt
1 tsp
Oil
2 Tbl
Whole wheat flour
10.5 oz.
White bread flour
5 oz.
Sponge

Set the bread machine for the whole wheat cycle and press start.

I don't have a recent picture of a completed whole wheat loaf. It sometimes sports the Pompadour hair style. These loaves tend to rise rather high, yielding a tall loaf of bread. I might try swapping some of the white flour for whole wheat in the future.

Saturday, May 9, 2020

Optimizing the Starter Refresh

I posted a few weeks ago about trouble with trying to reduce the amount of waste when refreshing my starter. I found that the ratio of new ingredients to old starter was important.

I would still like to reduce the amount of waste, so I have continued to experiment with ratios of old starter to new ingredients. I determined in the old post that 4 oz. of old starter added to 4 oz. of flour and 4 oz. of water (all measurements by weight) produced an energetically refreshed starter, but I only need 4 oz. for a new loaf of bread, leaving 4 oz. of waste in the next refresh.

I decided to try keeping the ratio of old starter:flour:water at 1:1:1, but using smaller amounts. My first reduced-waste experiment used 3 oz. quantities of each component. The start of the refresh looks like this:


Ten hours later it has grown to this:


It is a nice, healthy starter that went on to make a nice, healthy loaf of bread.

The following week, I took this experiment one step further by using 2 oz. of each ingredient. I don't have side views, but this experiment was also successful. At the start of the refresh, I had this:


That turned into this in 7-1/2 hours


That starter also produced a nice loaf of bread.

Now, I have a waste-free process. The 2+2+2 refresh leaves 6 oz. of starter, and I use 4 oz. for my bread. That leaves 2 oz. for my next refresh.

Tuesday, April 28, 2020

Whole Wheat Revisited

My whole wheat recipe had been giving me some disappointing results. Part of that was due to my sluggish starter. I also think that the amount of water that I was using was a little skimpy. My old recipe was

Whole Wheat, Take 6

Prepare sponge.  When it is ready, put these ingredients in the bread machine with the white flour going in last.  Add the sponge on top.
Water
4 oz.
Whole wheat flour
2 ¼ cups
White flour
1  cup
Vital Gluten
none
Salt
1 tsp
Oil
2 Tbl
Honey
¼ cup

My next attempt added 2 oz. more of water. I used the 4+4+4 starter refresh. That is take 4 oz. (all measurements by weight) of the old starter, add 4 oz. of white flour, and 4 oz. of water. I let that mature for 10-12 hours. I use the same formula to create the sponge, except that it uses 4 oz. of the newly refreshed starter. My sponge starts looking like this:


That was a 9PM. The next morning at 6AM the sponge has expanded nicely.


For my recipe, I've decided to measure my flour by weight for more consistent results. The recipe is now
Whole Wheat, Take 7
Prepare sponge.  When it is ready, put these ingredients in the bread machine with the white flour going in last.  Add the sponge on top.
Water
4 oz.
Whole wheat flour
10.5 oz.
White flour
5 oz.
Vital Gluten
none
Salt
1 tsp
Oil
2 Tbl
Honey
¼ cup

This mixture made a nice looking dough ball in the bread machine.


The completed loaf rose better than any whole wheat sourdough loaf to date. What can't be seen here is that the pompadour hair style that my rye loaves used to  exhibit has shown up in the whole wheat bread. I'll add some milk in place of some of the water next time.


As a bonus, it was delicious. 

Wednesday, April 1, 2020

Slow Starter

I thought I had this all figured out, but lately my starter has been a little sluggish to start. Originally, I had been using the practice of discarding half of my starter and refreshing it with 4 oz. (by weight) of white bread flour and 4 oz. of water (by weight or volume, they are the same for water). My recipes call for 4 oz. of starter, so I figured, "Why throw out half? Just add 2 oz. of flour and 2 oz. of water to get the extra 4 oz. that my recipe needs."

Well, it seems that my starter is not so refreshed with that method. I decided to try an experiment. The week-old starter (since the last refresh and bread baking) that I had in my fridge was about 8 oz. I divided that into two containers of 4 oz. each. To one, I added 4 oz. of flour and 4 oz. of water. (The left container in the picture.) To the other, I added 2 oz. of flour and 2 oz. of water. The arrows are the levels at the beginning of the maturing process. The level in the left container is a bit obscured by starter that was stuck to the sides.


I set them out to grow for about 8 hours. Not much had happened by then.


I left them for another 12 hours.


It's not so clear from these views, but the container on the left has grown some. So has the second container, but not nearly as much. Opening the containers shows that the 4+4 refresh (left) is much more active than the 2+2 (right).


It appears the refresh needs a higher ratio of new ingredients to the old stuff. I might still be able to get away with a 2+2 refresh, but I might need to start with a smaller quantity of starter.

I've been having some disappointing results with my bread loaves, so I'm not going to try that experiment right away. I want to have a good loaf of bread.

Monday, January 28, 2019

Rye bread gets a new hair style

Remember the Pompadour hair style that my rye loaves used to always get?


I've found a solution. I simply need to use some milk in place of some of the water. Milk has some solids suspended in it, so I can't make a one-to-one substitution. I've been using this recipe, lately.

Rye Bread without Pompadour
Remove 4 oz. of starter from the fridge.  Add 4 oz. of white flour and 4 oz. of water.  Set in a warm place for about 8-12 hours until it doubles in size.  Then, add
Water
4 oz.
Milk
4 oz.
Salt
1 tsp
Caraway seeds
1 Tbl
Oil
2 Tbl
Vital gluten
2 tsp
Rye flour
2 Cup
White bread flour
1 1/3 Cup

Now, my bread comes out looking like this:


That's a much more attractive hair style for a loaf of bread.

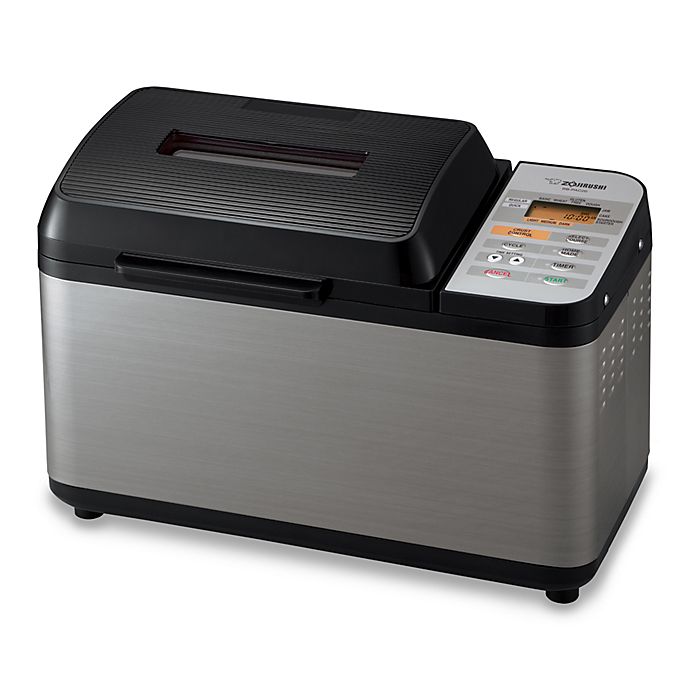
In other news, my bread maker started acting up. It's motor seemed to be straining. Fearing a fire, I replaced my bread maker with this high-end Zojirushi model


It's rather expensive for a bread maker, but you only cry once when you pay for quality. It has a user-programmable cycle that I thought would be useful, but so far, I've only used the built-in whole wheat cycle. Both my whole wheat and rye recipes work well on that cycle.

The thing I like most about the new machine is that it has two mixing/kneading paddles. It does a much better job at mixing the dough. Another nice feature is that the spindles fill the wholes in the paddles, so baked in dough doesn't get stuck in the wholes, making them difficult to clean. The only drawback is that my recipes are for 1-½ pound loaves, so my bread comes out kind of long and short. I could adjust my recipes for 2 pound loaves, but I would not eat it before it goes stale or moldy.

Wednesday, April 4, 2018

Carried Away with Caraway Seeds

There is no question that rye bread is better when it contains caraway seeds. I wouldn't think of making it without them. They are, on the other hand, kind of pricey. At first I bought the seeds in the normal McCormick spice rack.
This little jar is a little under an ounce and costs $5.99 at my local grocery store. It was kind of fun to see the unit pricing sticker on the shelf. It showed that this spice costs $100 per pound.

My recipe calls for 1 tablespoon of caraway seeds for a loaf of bread. This little jar only contains about 4 tablespoons of caraway seeds. So, this crucial ingredient adds about $1.50 to each loaf of bread. That's not really a big deal. A loaf of bread lasts me a week, and the caraway seeds make the bread taste delicious. The annoying part was that I was always running out of caraway seeds.

I looked for a larger sized jar, but this was the only one in the normal McCormick spice section at the grocery store. Then, I wandered to the adjacent fancy "organic" spice section. I wasn't expecting any bargains here, but I did find a larger jar.
This jar is about twice the size, and surprisingly, even though this is McCormick's "Gourmet Organic" caraway seed, it is only 20 cents more than the small jar.

Well, this solved my problem of the jar that only lasted for 4 loaves, and it brought the cost per loaf for this essential ingredient down to under a dollar.

Then, last week, I was shopping for something unrelated on Amazon. I needed to add about $10 to my order to qualify for free shipping. Well, I only had about a tablespoon left in my caraway jar, so I thought I'd look to see if I buy $10 worth of caraway seeds. Imagine my delight when I found this one pound jar of caraway seeds for $12.

I haven't tried these in a recipe, yet, but estimating that 1 tablespoon of caraway seed is about 1/4 ounce, I can make 64 loaves of bread with this jar. Now, my essential rye bread flavoring is only 19 cents per loaf.

That is your Home Economics lesson for the day.
You're welcome.